construction scripts
So far everything we've been doing in the Blueprint editor has been in the Event Graph so we can get the engine to Print out to screen when we hit play. Blueprints in Unreal basically have two distinct modes: Event Graph and Construction Script. The Event Graph is what runs at runtime and controls any animation or in game logic - the Construction Script is run in the editor and used to set up our Blueprints. Most of the time these are going to be used together, but there's nothing wrong with having purely Construction or purely Event Blueprints.

Firstly a few notes about terminology and workflow. In Unreal they've done a few handy things to make things easier to work with - specifically, there is a Context Sensitive checkbox. This means that the list of available nodes is filtered to only give you the ones that apply to the pin you're working with. Because of this ALWAYS pull off the pin of the node you're working with - it makes finding what you're after easier and there's sometimes multiple nodes with the same name but different contexts, so it avoids any errors there.
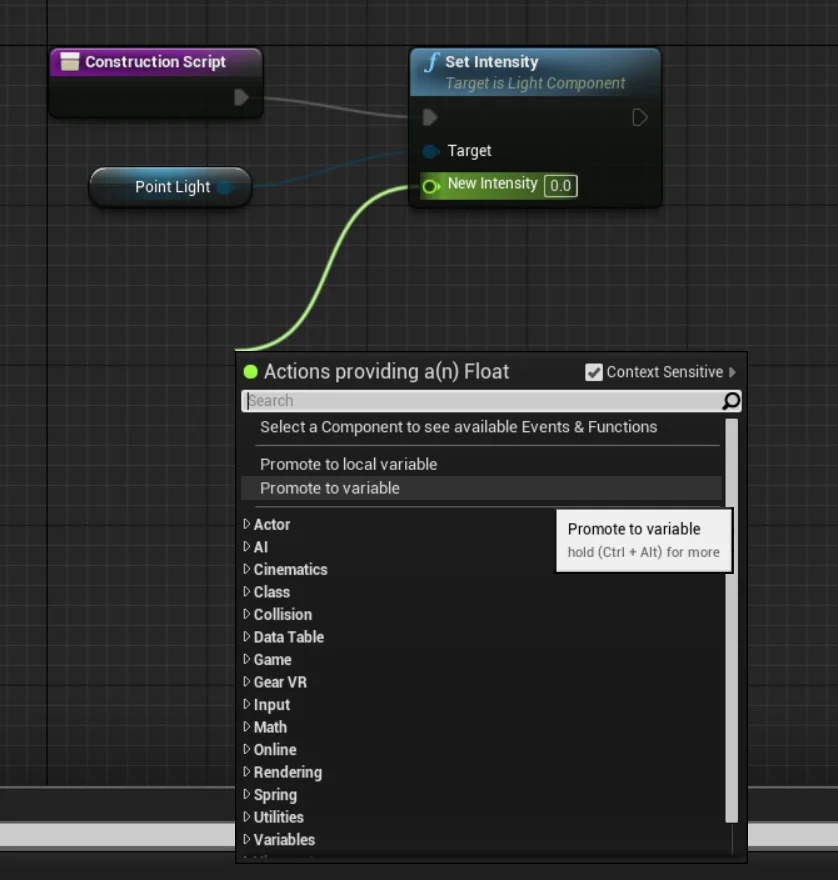
The second little tip is when you're creating Variables you can always pull off the data you want to drive and Promote to a Variable. This will ensure you have the right data type for the type of data you need.

Lastly you may have noticed Variable and Local Variable in the last image. A Local Variable is one that's only available in the current context - what this means is that if you create a Local Variable in the Construction Script (or in a Function) it won't be available to read/write/edit in the Event Graph etc. This is helpful for keeping memory costs down (i believe) and keeping your Blueprints clean and organised, for the purposes of these tutorials, however, I'm just going to use Variables for everything.
Custom UI


So firstly we're going to continue where we left off with Data Types and build a simple UI for our Blueprint. We've just added a Point Light Component and promoted a few Variables to control the Intensity, Radius and Colour. By setting these to exposed we've created a very simple UI for our Blueprint. So why do this rather than just place a Point Light in the world? Well, we can have multiple components in our Blueprint - eg. a Torch with a Mesh, Fire PFX and a Point Light - in that case the Lighting Artist will still want control over the Point Light settings, but the Level Artist will want to place the Torches together, rather than having to place the Meshes, PFX and Lights individually, so by having a Torch BP with a UI, everyone wins!

Note the label Default in our UI image above - when Variables are created they're set to the Default Category (see above). As your Blueprints get more complex you may want to set your Variables into their own Categories to keep them organised and easy to use.
Materials
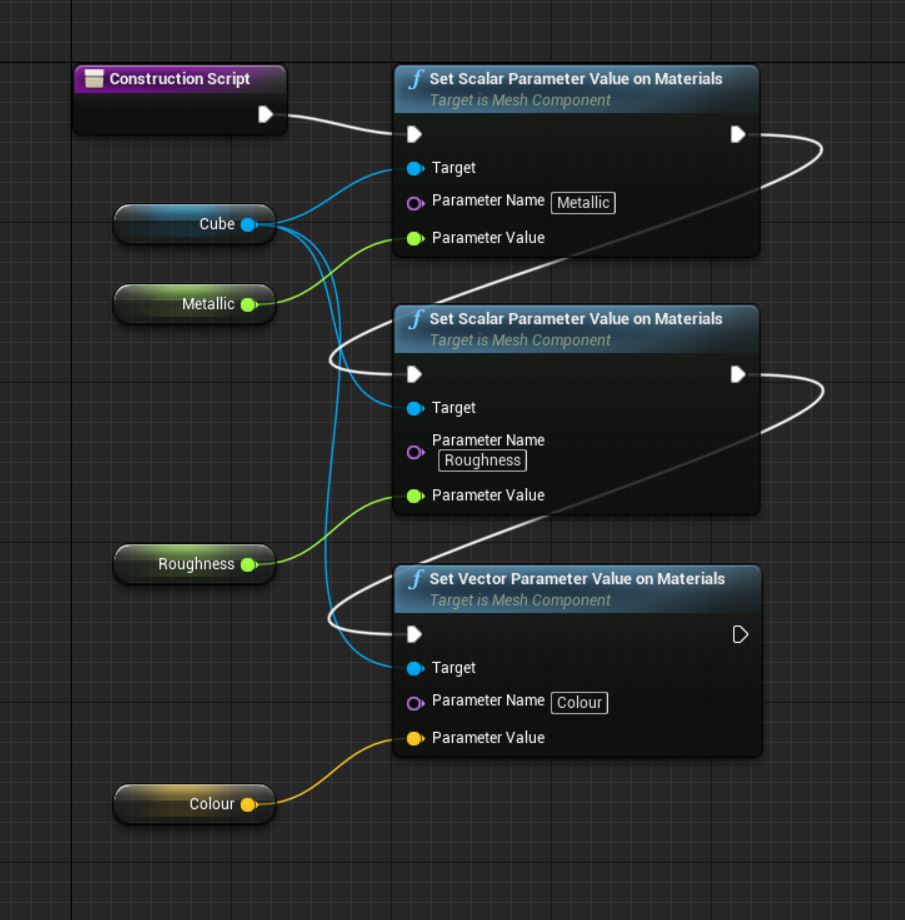
Editing Parameter Values on things like Point Lights is relatively simple - what if we want to control parts of a Material that we've built? Well, as always, there's a way to do that. Here we're just using the Set Scalar Parameter Value on Materials Node to change the Metallic, Roughness and Colour parameters that exist in our material. Pay attention to typos! The Engine looks for the name of the Parameters using the String you type in so if you spell something wrong (eg. Colour =/= Color) then it won't work.
Note the Colour parameter is accepting a Vector so we don't have any access to the Alpha value using this method (this is probably a bug as we'll see shortly).
Here we're doing something slightly more complicated: we're creating a Dynamic Material Instance, based on the Material in Element Index 0 of Cube and storing that as a Variable. This Dynamic Material is then assigned to both the other Cubes so we can just edit the values of the Material and all the cubes will update. Note here the engine knows that the Vector Parameter value we're passing to the material is a Colour, rather than a Vector.
Random

So creating a UI and editing values in engine is very powerful but we can take this a bit further and use Unreal to do some randomisation for us. Here we're very simply just creating a Random value between 0-500 and setting our Cube Z Location. This is great but you'll notice that if you move this Blueprint around in editor the Cube flickers about massively. This is because actually when you move something Unreal is destroying the original and creating a new copy in the new position - this causes the Construction Script to run again, hence the randomness. Luckily there's something we can do to fix this:

Here we're using a Seed Value to create a Stream for our Randomness. What this means is that it bases the Random Float off of the Stream - while still retaining the Randomness. ie if you change the seed from 1 to 2 to 3 etc. there's no pattern but the random value no longer updates every frame when you move the object. Try it out - it's easier to see what's happening than explain it :)
Adding components
So far all we've been doing is editing values on Components we've already added - very useful and powerful but Unreal can do more. Here we're adding a Static Mesh and Particle Component and setting their Transforms via the Construction Script. Note how there's nothing in the Component list of the Blueprint - everything is added via our script.
We've also exposed the Mesh and Particle Template Parameters allowing the level artist the flexibility to combine any Mesh and PFX together in the level.
So what's more useful than adding Components via code? Adding multiple Components! Here we're using a For Loop to create a number of boxes and offset them in Z via exposed parameters. Don't forget to specify which mesh is being added in the Add Static Mesh Component settings - or add a Set Static Mesh and promote the Mesh to an editable Variable as before.
I'll go into For Loops in more detail in the next tutorial but hopefully you can start to get an idea of how powerful construction scripts are - we have full control over any and all parameters, randomness and we can add any new components we need.